Figma MCP Setup Guide for Google Antigravity
A step-by-step guide to setting up the Figma MCP server on Google Antigravity, including critical fixes for local server configuration and stdio mode.
Future Compatibility: This guide addresses current limitations with the Figma MCP server and Google Antigravity. Future updates to either the Figma MCP package or the IDE may resolve these issues, rendering this workaround unnecessary. Please check for native support or updated documentation before proceeding.
This guide details how to set up the Figma MCP server on Google Antigravity. This is a key enabler for the “Vibe Coding” workflow I described in From Copy-Paste Hell to Vibe Coding, allowing your agent to “see” your designs and verify its own work.
Here are the critical fixes we discovered (local server, stdio mode, and silencing stdout pollution).
Prerequisites
- Node.js: Version 18+ (verified with v24.11.1).
- npm: Installed with Node.js.
- Antigravity: Installed and configured.
Step 1: Generate Figma Personal Access Token
- Log in to Figma in your browser.
- Go to Settings -> Security.
- Under Personal Access Tokens, click Generate new token.
- Name it (e.g., “Antigravity MCP”) and ensure it has Files > file_content:read permission.
- Copy the token immediately. You will need it later.
Step 2: Install the MCP Server Package
Open your terminal in the Antigravity directory (or wherever you want the package to live) and install figma-mcp-server.
Do NOT install
figma-developer-mcp. It does not support the requiredstdiomode correctly for this setup. Usefigma-mcp-server.
1
npm install figma-mcp-server -g
Step 3: Patch the Server (Critical)
The figma-mcp-server package prints a debug message to standard output on startup, which breaks the JSON communication protocol used by Antigravity. You must silence this.
- Locate the file
node_modules/figma-mcp-server/mcpServer.js. - Open it in a text editor.
- Find the line:
1
dotenv.config({ path: path.resolve(__dirname, ".env") });
- Comment it out by adding
//at the beginning:1
// dotenv.config({ path: path.resolve(__dirname, ".env") }); - Save the file.
Step 4: Configure Antigravity
Open or create your mcp_config.json file and add the following configuration.
You must use absolute paths for the
command,args, andPATHto avoid “EOF” errors. Replace the paths below with the actual paths on your new computer.
1
2
3
4
5
6
7
8
9
10
11
12
13
{
  "mcpServers": {
    "figma": {
      "command": "node",
      "args": [
        "/ABSOLUTE/PATH/TO/YOUR/node_modules/figma-mcp-server/mcpServer.js"
      ],
      "env": {
        "FIGMA_API_KEY": "YOUR_FIGMA_TOKEN_FROM_STEP_1"
      }
    }
  }
}
Example Configuration
If your username is jdoe, it might look like this:
1
2
3
4
5
6
7
8
9
10
11
12
13
{
  "mcpServers": {
    "figma": {
      "command": "node",
      "args": [
        "/home/jdoe/antigravity/node_modules/figma-mcp-server/mcpServer.js"
      ],
      "env": {
        "FIGMA_API_KEY": "figd_xxxxxxxxxxxxxxxxxxxxxxxx"
      }
    }
  }
}
Troubleshooting
- EOF Error: Usually means Antigravity can’t find the
nodeexecutable. Check your absolute paths and thePATHenvironment variable. - Invalid Character Error: Usually means something is printing to stdout (like
dotenv). Double-check Step 3. - Unauthorized: Check your
FIGMA_API_KEYin Step 4.
Test Case: Frontend Mentor QR Code Component
I tested the Figma MCP by implementing the Frontend Mentor QR Code Component using React and Tailwind CSS.
Comparison:
| Figma Design | React Implementation |
|---|---|
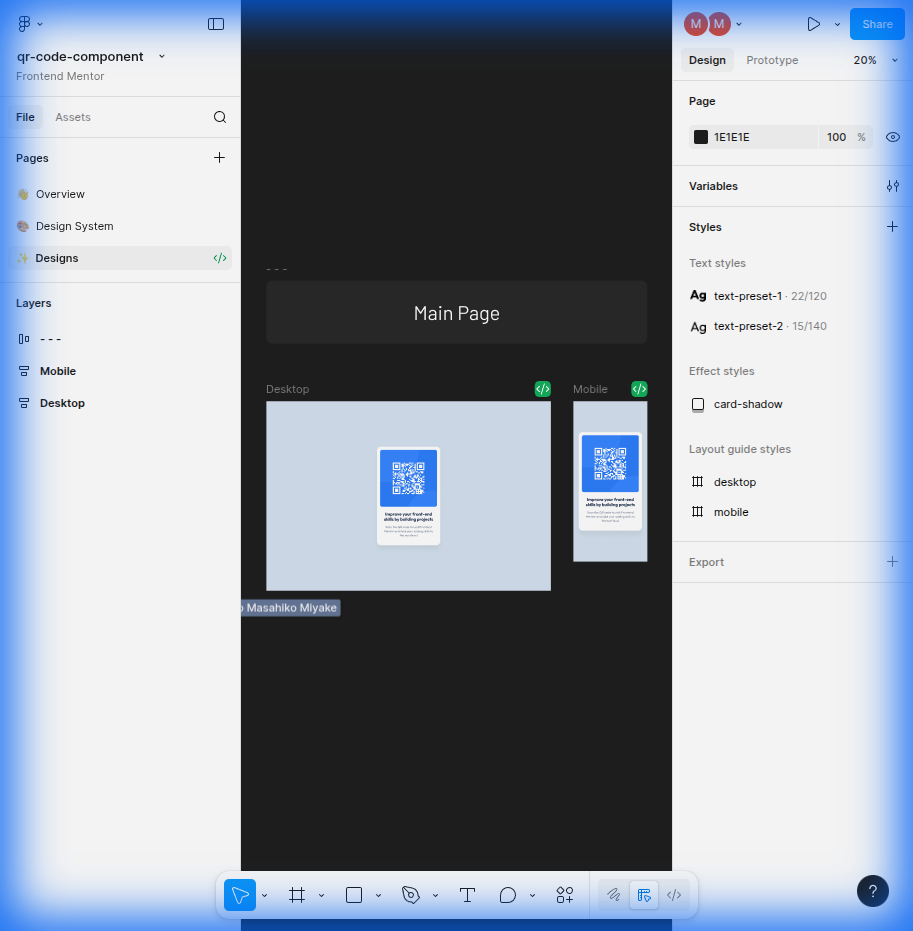 | 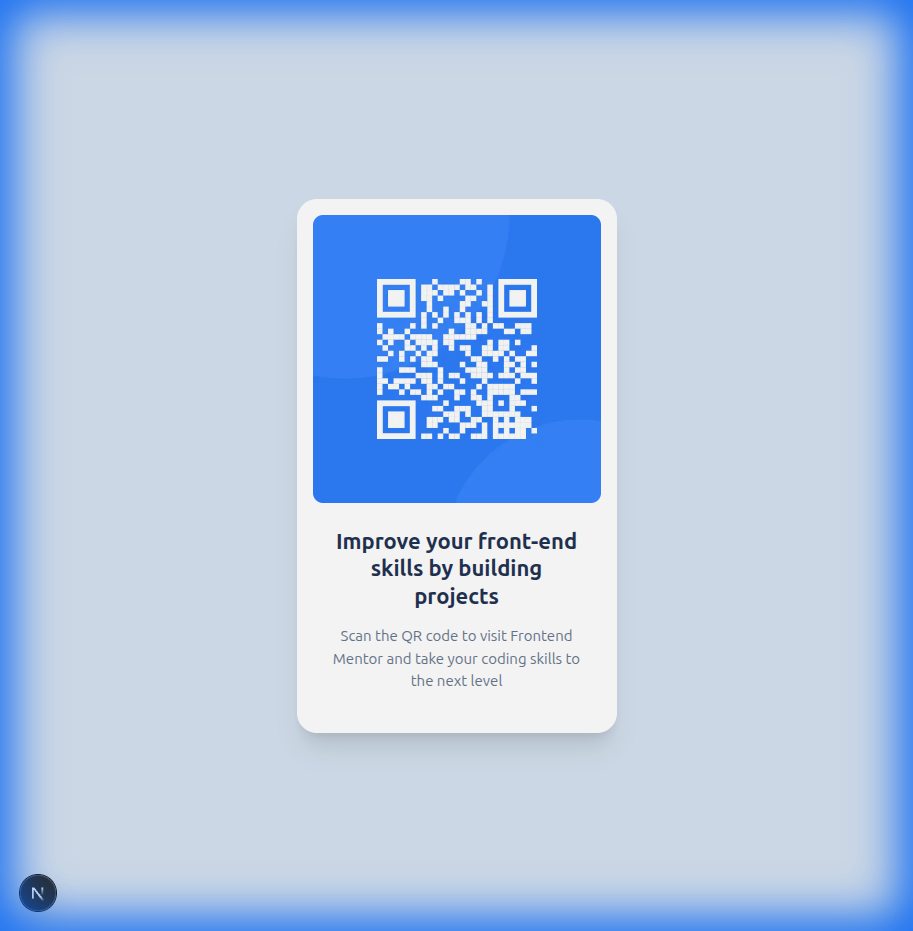 |
Result: The implementation closely matches the Figma design, demonstrating the effectiveness of using the Figma MCP to retrieve design details (colors, typography, spacing) directly within the IDE.